// Affiliate disclosure: some of the links in this post are affiliate links, which means we may earn a small commission if you buy through one, at no extra cost to you. And if you do, that money goes straight to our knife problem (or beer money, let's be honest).
📸 PHOTO 1 — REPLACE WITH IMAGE
Michael’s own usuba flat on the board beside a nakiri, single-bevel back (urasuki) angled to camera so the hollow grind and shinogi line read clearly.
ALT: usuba knife shown next to a nakiri, single-bevel back and hollow grind visible
The first time I tried to peel a daikon with an usuba, I produced something that looked less like a translucent ribbon and more like coleslaw that had lost a fight. Thick chunks. Torn edges. One heroic three-inch stretch of actual sheet that I photographed like a proud parent before it fell apart. I’d bought this beautiful single-bevel Japanese knife expecting it to make me a better cook by association. It made me humble instead.
That daikon massacre taught me more about this knife than the specs could. An usuba isn’t a knife you buy and use — it’s one you buy and learn. Get that part straight and it becomes the most precise vegetable tool in your kitchen. Skip it, and you’ve spent good money on wall art.
The Short Answer
What Is an Usuba Knife Used For?
An usuba knife is a thin, single-bevel Japanese vegetable knife with a flat edge and a tall, rectangular blade. It's used for clean push-cut slicing, paper-thin vegetable prep, decorative garnish, and katsuramuki rotary peeling. The flat edge and single-bevel grind let it sever cleanly straight down onto the board.
Key Takeaways
- Vegetables only. The usuba is a specialist for vegetable preparation — no bones, no meat and fish, no hard winter squash. That's a deba's job, not this one's.
- Single-bevel, single-edged. The edge is ground on one side with a hollow (urasuki) on the back. That geometry gives surgical thinness and a learning curve to match.
- Katsuramuki is the party trick. Rotary peeling a daikon into one continuous paper-thin sheet is the signature technique — and the reason to own one.
- High skill, high care. It steers as you cut, it needs proper sharpening on one bevel, and carbon versions will rust if you look at them wrong.
- A nakiri is the easier alternative. For most home cooks, the double-bevel nakiri does 90% of the job with none of the drama.
What an Usuba Actually Is
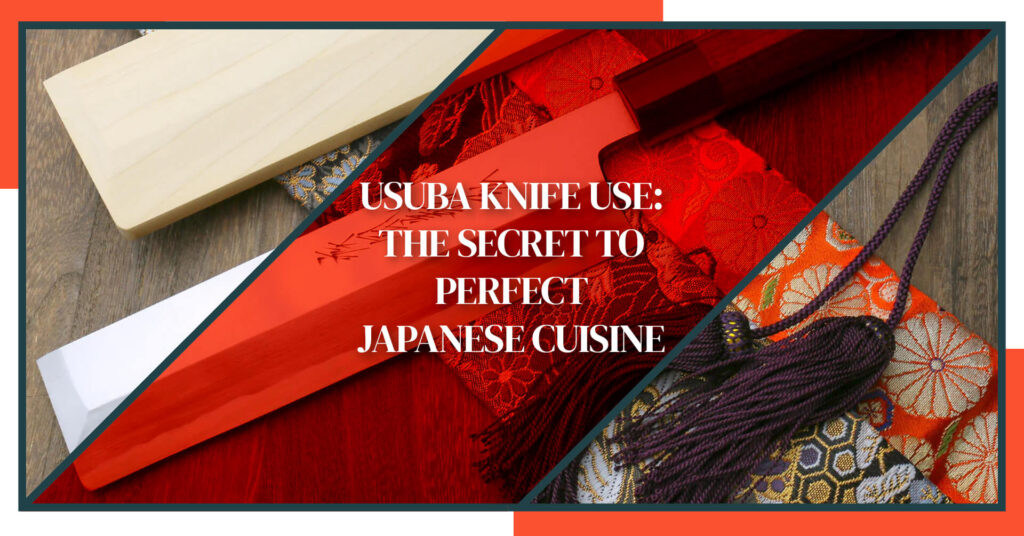
Usuba (薄刃) translates roughly to “thin blade,” and the name isn’t a sales flourish — it’s a spec. This is a genuinely thin blade — the spine has real thickness for rigidity, but the edge tapers to almost nothing — with a tall, flat, rectangular profile that looks a lot like a small cleaver but behaves nothing like one. A cleaver hacks. The usuba glides straight down to cut vegetables and stops the instant it kisses the cutting board. It’s one of the oldest traditional Japanese knife shapes still in daily use, and among the most specialized pieces of cutlery in any kitchen.
Two features define it, and both need translating.
First, it’s single-bevel (kataba) — the cutting edge is ground on one side only, unlike the double-bevel edge on your Western chef’s knife, which is sharpened on both. Second, the flat back isn’t actually dead flat: it’s hollowed out with a slight concave grind called urasuki. That hollow does two useful things — it reduces friction so slices release cleanly instead of clinging to the blade, and it leaves a thin flat rim (the uraoshi) around the edge that you maintain when you sharpen. Running up the side of the blade is the shinogi line, the ridge where the flat face meets the bevel. On a well-made usuba it’s crisp and dead straight.
The hollow on the back is why an usuba can cut a slice so thin you can read a newspaper through it. A flat back would suck onto the vegetable like a wet suction cup. The hollow breaks that grip, so cut surfaces peel away clean. It’s not decorative — it’s the whole point of a single-bevel grind.
The single bevel is also why this knife has a handedness. A standard usuba is ground for right-handed use. Lefties need a left-handed usuba, which is a rarer, usually custom, usually pricier animal — more on that below, because it’s a real live question if you happen to cut with the other hand.
What You Use an Usuba For
Here’s the honest job description. An usuba is a precision vegetable knife, full stop. Inside that lane it’s magnificent. Step outside it and you’ll chip the edge and curse my name.
What the usuba is brilliant at: – Push-cut slicing. Straight down, no rocking. The flat edge means the whole blade contacts the board at once for clean, even slices. – Paper-thin vegetable prep. Slicing daikon, cucumber, and cabbage thinly enough to see through — the thin blade and single-bevel edge make it almost unfair. – Katsuramuki (rotary peeling). The continuous-sheet daikon technique that put this knife on the map. – Decorative and mukimono garnish. The fine, delicate work of Japanese cuisine — carved shapes, fine juliennes, the fiddly plate stuff. – Chopping vegetables cleanly. Herbs, scallions, anything you want cut rather than bruised.
What the usuba is the wrong tool for: – Bones, joints, meat and fish. That’s a deba’s job. Try it and you’ll fold the edge. – Hard winter squash and dense roots you have to force. The thin edge is not built to be levered through a curb. – Rocking cuts. No belly, no rock. This is a chop-and-lift knife. – Being your only knife. It’s a specialist, not a versatile do-everything blade. It doesn’t want to be a gyuto.
The rule is the same one I burn into every knife guide: if you’re using force, you’ve got the wrong knife in your hand. An usuba is steered and dropped, never shoved.
How to Do Katsuramuki (Rotary Peeling)
This is the technique the whole internet foregrounds and almost nobody actually teaches. Katsuramuki is the art of turning a cylinder of daikon into one continuous, unbroken, paper-thin sheet — which you then stack, roll, and cut into hair-fine threads. It is the single reason a serious cook covets an usuba. It is also the reason my first daikon became coleslaw.
Here’s the method, step by step.
1. Prep the cylinder. Cut a section of daikon 3–4 inches long and square off the ends so it sits like a fat can. Peel the outer skin first. 2. Set the grip. Hold the daikon in your non-dominant hand, fingers wrapped around it. Hold the usuba flat and level, edge pointed slightly into the daikon, the blade roughly parallel to the cutting board. 3. Thumb is the guide. Rest your dominant thumb on the spine or the vegetable as a depth gauge. This is the whole game — your thumb regulates how thick the sheet comes off, not brute pressure. 4. Rotate, don’t saw. Gently push the daikon into the edge with your holding hand while walking the blade with tiny up-and-down movements. The vegetable turns; the knife mostly holds position. You’re peeling a scroll off a log. 5. Aim for continuous. The goal is one unbroken sheet as thin as you can hold it without tearing. Thin and continuous beats thick and pretty. 6. Stack and slice. Fold the finished sheet into layers, then cut across it thinly for classic daikon threads (the ken you see under sashimi).
Realistic expectations, because I’m not going to lie to you: your first sheet will tear. So will your fifth. The continuous ribbon shows up somewhere around attempt fifteen to twenty, and even then it comes and goes. This is a technique that rewards reps, not talent. Don’t overthink it — put a cheap daikon on the board and just keep going.
📸 PHOTO 2 — REPLACE WITH IMAGE
Katsuramuki in progress — a peeled daikon cylinder mid-rotation with a continuous paper-thin sheet coming off the usuba, thumb visible as the guide.
ALT: usuba knife performing katsuramuki rotary peeling on a daikon into a thin sheet
Kanto vs. Kamagata: The Two Usuba Styles
Usubas come in two regional shapes, and this trips people up because they look different enough to seem like different knives. They’re the same tool with two different tips, split down old Tokyo-versus-Osaka lines.
The Kanto style is the Tokyo/eastern shape: a strictly rectangular blade with a blunt, square tip. Straight edge, straight spine, a clean rectangular shape — this is the one most people picture when they picture an usuba. Kanto-style blades are all business.
The Kamagata (also called the Kansai style, from the Osaka/Kyoto region) has a curved, rounded tip that sweeps up into a point — a sheep’s-foot profile that makes fine tip work and decorative carving easier. That pointed tip is why a lot of professional chefs doing mukimono garnish reach for a kamagata usuba. There’s also a mukimono usuba, an even more specialized decorative-work variant, but for most buyers the choice is simply Kanto or Kamagata.
| Kanto (Tokyo) | Kamagata / Kansai (Osaka·Kyoto) | |
|---|---|---|
| Tip shape | Rectangular, blunt square tip | Curved sheep's-foot, pointed tip |
| Blade profile | Straight edge, straight spine | Straight edge, rounded upper tip |
| Region | Kanto / Tokyo | Kansai / Osaka / Kyoto |
| Best for | Straight-down push cuts, everyday veg | Tip work, fine carving, decorative garnish |
📸 PHOTO 4 — REPLACE WITH IMAGE
Two usuba tips side by side — rectangular blunt (Kanto) vs. pointed sheep’s-foot (Kamagata).
ALT: Kanto rectangular usuba tip beside a pointed Kamagata usuba tip
Which should you get? If you’re new to the style, the Kanto’s blunt tip is more forgiving and the shape is dead simple. If you already know you want to do decorative work, the kamagata’s point earns its keep.
Usuba vs. Nakiri: Which Should You Actually Use?
This is the fork in the road, and I’m not going to fence-sit on it. For most people reading this, the answer is a nakiri.
Both are tall, flat-edged Japanese vegetable knives that chop straight down. The difference is the grind. A nakiri knife is double-bevel — sharpened on both sides, neutral-tracking, dishwasher-of-the-soul easy. An usuba is single-bevel, thinner, capable of finer work, and far more demanding. The nakiri is the easygoing partner who’s happy to help with dinner. The usuba is the brilliant, high-maintenance one who makes you a better cook but expects you to put in the hours.
| Usuba | Nakiri | |
|---|---|---|
| Bevel | Single-bevel (one side) | Double bevel edge — ground both sides |
| Skill level | Advanced; a real learning curve | Beginner-friendly; recommended for beginners |
| Signature move | Katsuramuki, paper-thin slicing | Straightforward chop-and-slice |
| Handedness | Right or left-handed specific | Ambidextrous |
| Care | Single-bevel sharpening + rust watch | Simple, forgiving |
| Best for | Precision, garnish, technique | Everyday home use |
Reach for an usuba if: – You genuinely want to learn katsuramuki and precision technique – You already own a nakiri or gyuto and want to level up – You cook enough Japanese cuisine to justify a specialist blade
Stick with a nakiri if: – You want one knife that just chops vegetables without a tutorial – You’re not going to hand-wash and dry immediately, every time – You cut left-handed and don’t want to hunt down a custom grind
If you’re still weighing the two shapes head to head, I went deep on it in usuba vs. nakiri. And if you’re really trying to decide what your everyday board knife should be, nakiri vs. santoku is the other comparison worth reading.
Sizing, Steel & Choosing One (165mm, 180mm, 210mm)
Usuba blades run from about 165mm to 210mm. For home use, 180mm is the sweet spot — big enough for a full daikon, small enough to control. A 165mm feels nimble for smaller hands and smaller boards; a 210mm is a lot of tall blade to steer if you’re still learning. Note the tall blade profile gives you decent knuckle clearance either way, so your knuckles stay off the cutting board.
On steel, you’re choosing between two camps. Carbon steel (traditional stuff like white or blue paper steel, and premium aogami) takes a scary-sharp edge and is easier to sharpen, but it will rust the moment you leave it wet. Stainless steel is more rust-resistant and lower-maintenance, at a small cost to outright sharpness. Damascus versions exist and look gorgeous — the pattern is cosmetic cladding around a core, so buy damascus for the looks, not for performance. Many of the best come out of Sakai, the traditional knife-making city, and you’ll see model names like homura and bunka thrown around in the same catalogs; ignore the branding noise and buy on steel and grind.
| Spec | What to know |
|---|---|
| Blade length | 165mm (nimble) · 180mm (home sweet spot) · 210mm (pro reach) |
| Steel — carbon | Sharpest, easiest to sharpen, rusts fast, needs babysitting |
| Steel — stainless | Rust-resistant, lower-maintenance, slightly less keen |
| Handedness | Right-hand standard; left-handed usuba is rare, custom, pricier |
| Price band | Roughly $130 entry to $350+ for serious traditional pieces |
A first usuba doesn’t need to be a $350 heirloom. A solid stainless 180mm in the $130–$180 band will teach you everything the technique has to teach you without the rust anxiety of carbon. Learn on that, and if the knife earns a permanent spot on your board, then graduate to a carbon Sakai piece. (Any specific pick I link is an affiliate link — buying through it costs you nothing extra and keeps this site running.)
Caring for a Single-Bevel Usuba
Single-bevel care is genuinely different from sharpening a Western knife, and this is where a lot of people quietly give up. It’s not hard — it’s just specific.
You sharpen the bevel side on the whetstone at its existing angle until you raise a burr along the whole edge. Then you flip to the flat back and lay it dead flat on the stone for just a few light passes to remove that burr — that’s the uraoshi, the thin flat rim around the hollow. You are polishing the rim, not regrinding the whole back.
Never grind the flat back like a bevel. If you round it or dig into the urasuki hollow, you’ve destroyed the geometry that makes an usuba an usuba — and that’s a job for a professional to fix, if it’s fixable at all. Flat side stays flat, and barely touched. Guess how I learned to respect that rule.
The rest is simpler. Hand-wash and dry immediately — carbon steel especially will show rust spots within hours if you leave it wet in the rack. A quick wipe between cuts on acidic veg keeps carbon happy. Don’t put it anywhere near a dishwasher, don’t use it to scoop chopped veg off the board with the edge (turn the knife over and scoop with the spine), and store it where the delicate edge won’t knock against other steel. Do that much and a good usuba outlives you. For the full breakdown on why carbon and stainless behave so differently, that’s its own rabbit hole.
HANDS-ON
On the Board — What It’s Actually Like
Here’s the verdict first, plainly: an usuba is a specialist that rewards the cook willing to practice and quietly punishes the one who wanted a shortcut. I own one, I use it, and I still reach for my nakiri most nights. Both of those things are true, and any page that tells you otherwise is selling you something.
📸 PHOTO 3 — REPLACE WITH IMAGE
Edge detail / care — the single bevel and flat back side-by-side on a whetstone, showing which side gets sharpened.
ALT: sharpening an usuba knife single bevel on a whetstone with the flat back shown
The thing nobody warns you about is that a single bevel steers. My nakiri tracks dead straight down through a daikon — neutral, boring, reliable. The usuba wants to drift, veering off the vertical toward the flat side because only one face is doing the wedging. For the first week my slices came out subtly wedge-shaped and I couldn’t work out why. Then it clicked: you have to lean the handle a hair to counter the pull, and once your hand learns that tiny correction it becomes invisible. That drift is the entire reason people call it a “pro” knife. It’s not that it’s harder to push through food — it’s that it argues with you until you learn its lean.
My first katsuramuki attempts were, and I want to be precise here, garbage. Thick where I pressed too hard, torn where I hesitated, and about the length of a business card before the sheet gave up. I kept a rough tally out of stubbornness — it took the better part of a month of ten-minute sessions before a ribbon came off long enough to actually roll and cut. The “pro-only” framing is half myth: you will absolutely get there as a home cook. Just don’t expect the internet’s continuous scroll on day one, and buy the cheap daikon in bulk, because you’ll turn a lot of it into confetti getting there.
The honest answer to Reddit’s “limited use” charge is that they’re both right and wrong. On a normal Tuesday — onions, herbs, a quick stir-fry — the nakiri wins every time and the usuba stays in the block, because I’m not doing precision work, I’m making dinner. But the nights I’m slicing cucumber thin enough to cure, or actually plating something, nothing else in the drawer comes close. It’s not a limited knife. It’s a specific knife, and the trick is being honest about how often you cook the way it’s built for.
An usuba doesn’t make you a better cook. It makes you a more patient one — and that turns out to be the same thing.
The Final Cut
Reddit’s verdict on the usuba — “very limited use, slim target audience” — gets quoted like a warning. I’d put it differently. The usuba isn’t limited; it’s honest. It does one family of jobs better than any knife on earth and makes no pretense of doing the rest. That’s not a flaw. That’s a knife that knows what it is, which is more than you can say for most of the drawer.
That first coleslaw daikon still lives in my memory as the moment I understood the deal. This knife doesn’t hand you skill — it hands you a really good reason to practice, and then it gets out of the way. Buy a cheap daikon, put on a podcast, and turn a few of them into confetti. Somewhere in there the ribbon comes off continuous, and you’ll get why people fall for this beautiful, demanding, one-trick genius of a blade.
Now go cut something thin.
What the FAQ
What is a usuba knife used for?
Precision vegetable work. It slices vegetables paper-thin, handles decorative garnish, chops herbs and greens cleanly, and performs katsuramuki — rotary-peeling a daikon into one continuous sheet. It’s a single-bevel specialist for vegetables only, not for meat, fish, or bones.
What is the difference between nakiri and usuba knives?
Bevel and skill. A nakiri is double-bevel, ambidextrous, and beginner-friendly. An usuba is single-bevel, handed, thinner, and capable of finer work — but with a real learning curve. Same tall, flat-edged shape; very different demands.
Can a beginner use a usuba knife?
Yes, but go in knowing it’s a project, not a plug-and-play knife. The single-bevel edge steers as you cut and katsuramuki takes weeks of practice. A total beginner is better served by a nakiri first, then an usuba once the basics are solid.
What is a usuba in Japanese?
Usuba (薄刃) means “thin blade.” Usuba bōchō is the full term — bōchō meaning kitchen knife. The name describes exactly what it is: a genuinely thin, single-edged blade built for slicing vegetables cleanly.
Is usuba better than nakiri?
Not better — more specialized. The usuba does finer, thinner, more technical work and asks far more of you in skill and care. For everyday home cooking a nakiri is the smarter buy. For dedicated technique and precision, the usuba pulls ahead.
Why are knives banned in Japan?
They’re not banned to own or cook with. Japan restricts carrying bladed tools in public without good reason under its weapons laws — a knife over about 6cm carried without justification can be an offense. Your usuba in your kitchen is completely fine.
Which is better, nakiri or santoku?
Depends on your cutting. A nakiri is a flat-edged vegetable specialist for straight-down chopping; a santoku is a more versatile all-rounder that also handles meat and fish. If it’s mostly vegetables, nakiri. If you want one do-most-things knife, santoku.
Usuba, Nakiri, or Something Else Entirely?
Not sure whether an usuba, a nakiri, or a plain chef’s knife fits how you actually cook? Try the 60-second Knife Finder tool and we’ll point you to the blade that earns its spot on your board — no single-bevel learning curve required unless you want one.